

I have lots of bottles at home like most people do. Soda bottles, wine bottles, balsamic vinegar bottles, maple syrup bottles... You get the picture. One day I just got tired of just throwing them all out so I decided to use them to decorate. It worked out great because I have a low decorating budget. If you want to make these bottles check out my tutorial!
What you'll need:
Glass bottles
Painters tape
Spray paint ( I used Krylon Gloss Black and White)
Newspaper to cover work work area
Instructions:


Remove Label. Try to peel as much as you can without wetting it. If you have glue residue which I'm sure you will, use baby oil or any oil available to try to remove. Soak a cotton ball in oil and rub the glue off. Repeat if necessary. Then wash with hot soapy water.

When your bottle is adhesive free and clean, you can start to tape it off. Make sure your bottle is completely dry!

Here's where my love for chevron temporarily fades.


Once you do your first row at the bottom you can use it as a guide for the rest of the rows.


This striped one is much easier. You may have to curve the tape that's closer to the top.

Important Tip: DON'T paint in 30mph wind conditions or during a Tornado Watch!

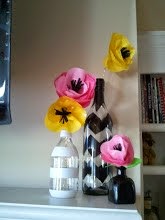
The little cute black bottle was a mini Patron bottle. I painted that one completely black.
If you want to make the paper flowers, come back soon for a tutorial on that.

No comments:
Post a Comment